The purpose of this document is to provide a guide for Transfer Payment (TP) Reporting users to assist them in navigating through the application.
To have access to TP Reporting, users are authenticated by GO Secure and therefore must be registered with authorization through management sign-off prior to using the application. For additional details on registering please go to: TP Reporting access
After successfully logging in, the landing page will be like the one shown below:
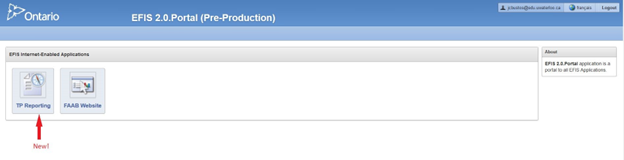
Enabled Applications:
- FAAB Website: opens a new tab in the browser with the Financial Analysis and Accountability Branch public website
- TP Reporting: will take you to the new Transfer Payment Reporting application for External Users
- If the user has authorization to access EFIS 2.0 EPM Planning, there will be an additional icon available for the EFIS EPM Site application
EFIS TP Reporting Application
Summary
This tab will allow users to generate the necessary reports based on their given level of access.
All users will have read-only mode at all times. No modification of any data should be done in TP Reporting, even if a user has privilege to modify the data in question in the Internal EFIS Transfer Payment Application.
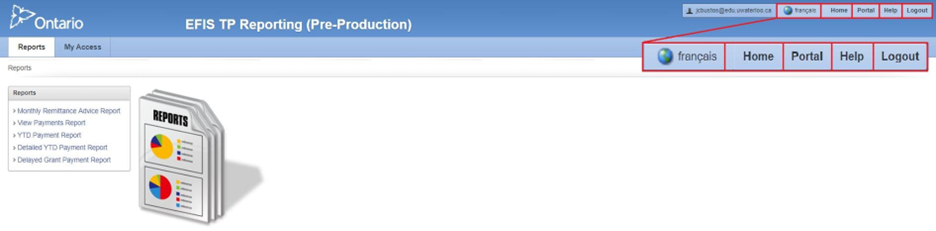
The following links are available to users from this page:
- Français - will take users to the French version of the page.
- Home - will take users back to this reporting home page.
- Portal - will take users back to the landing page.
- Help - will take users to the on-line Help page.
- Logout - will log users out from the Application and Go-Secure.
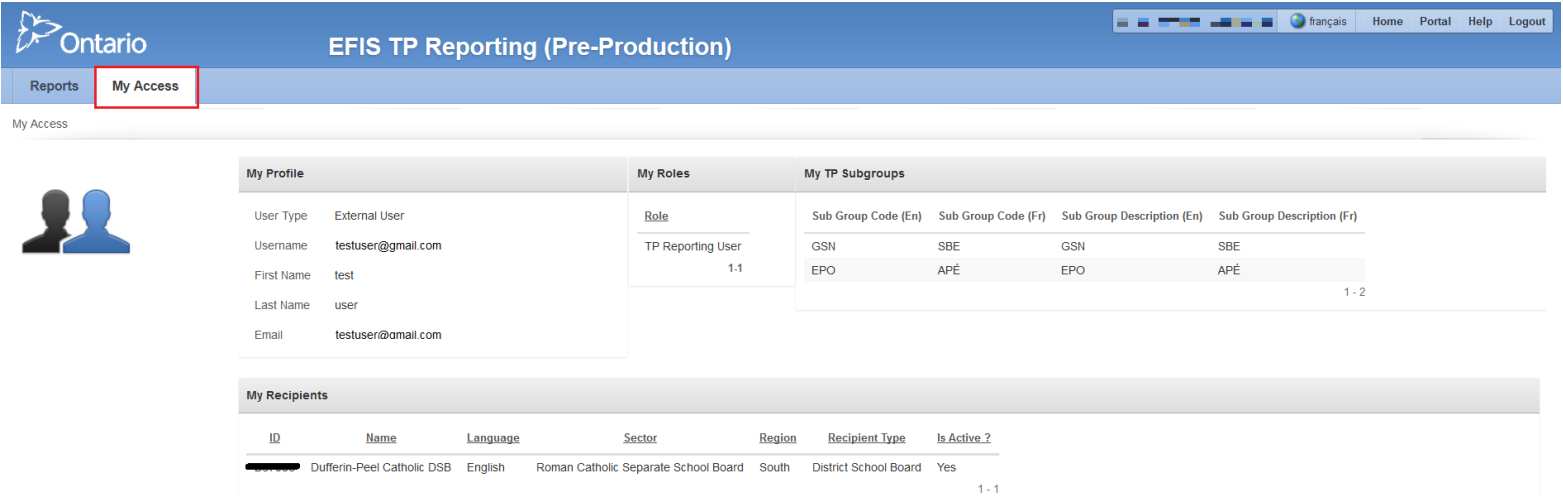
My Access
Users are provided with a detailed summary of their account in the My Access tab.
Some information available on this page include: Role(s) held by the user, TP Subgroups that they have access to, and the Recipient(s) that they can view.
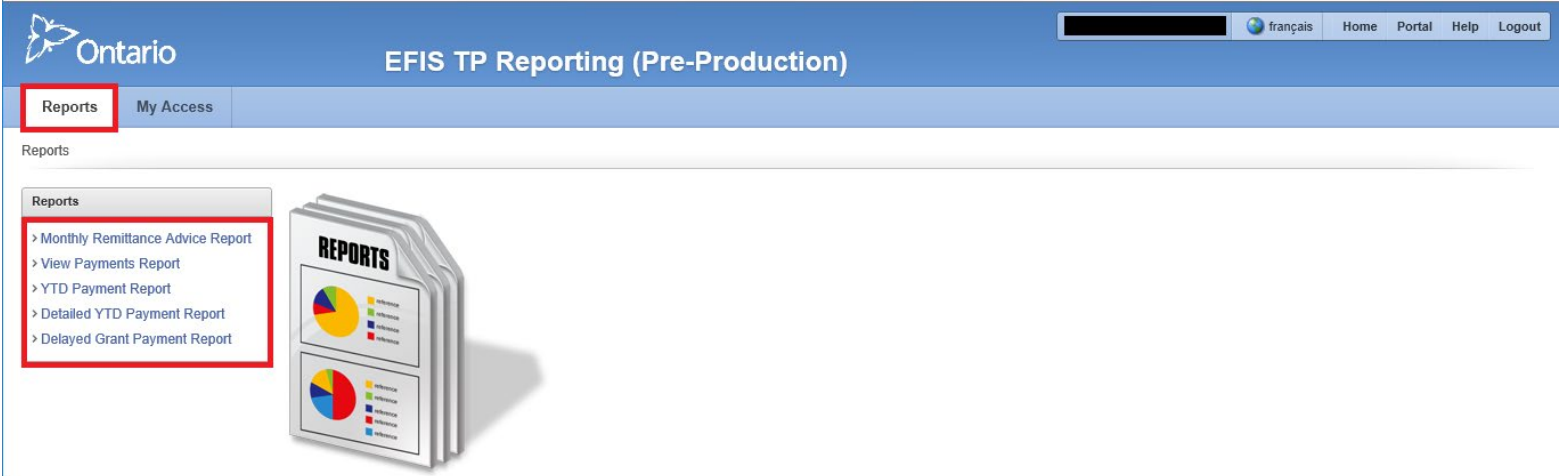
Reports
This application will allow users to generate the following reports based on their given security access:
1.3.1 List of TP Reports
-
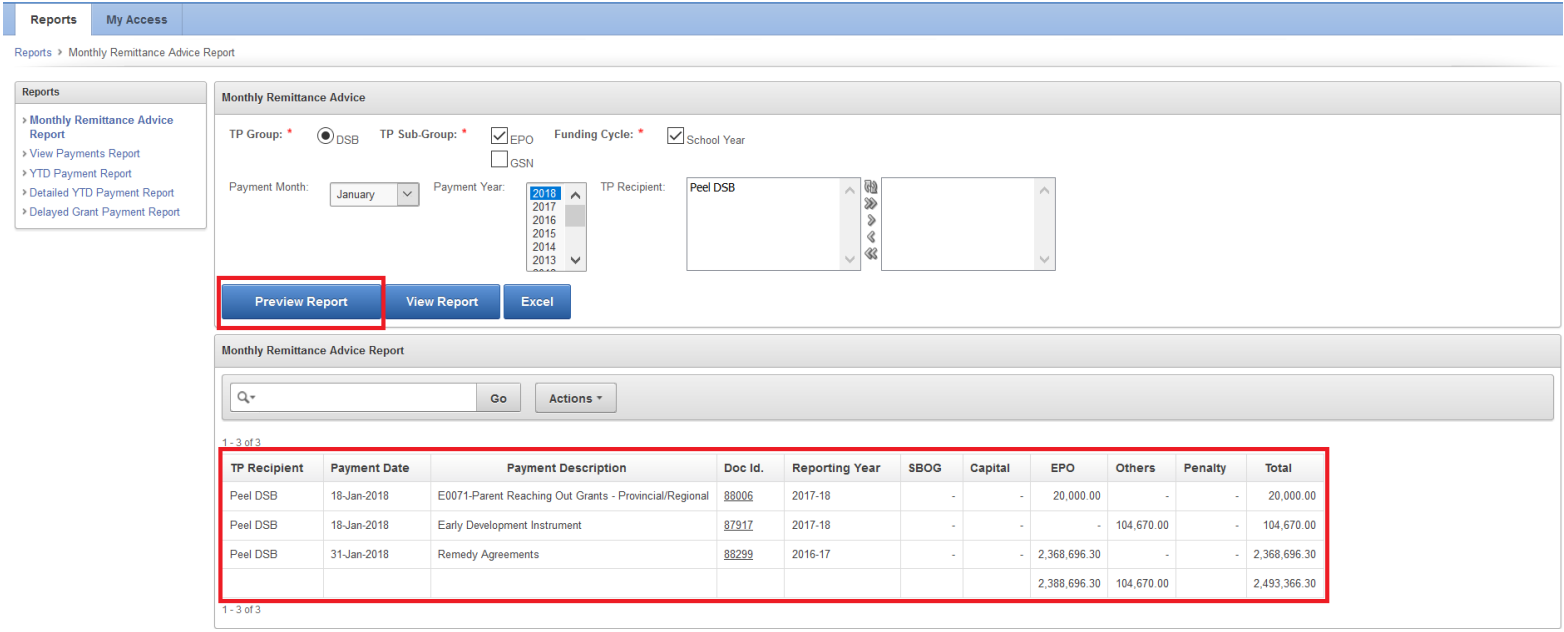
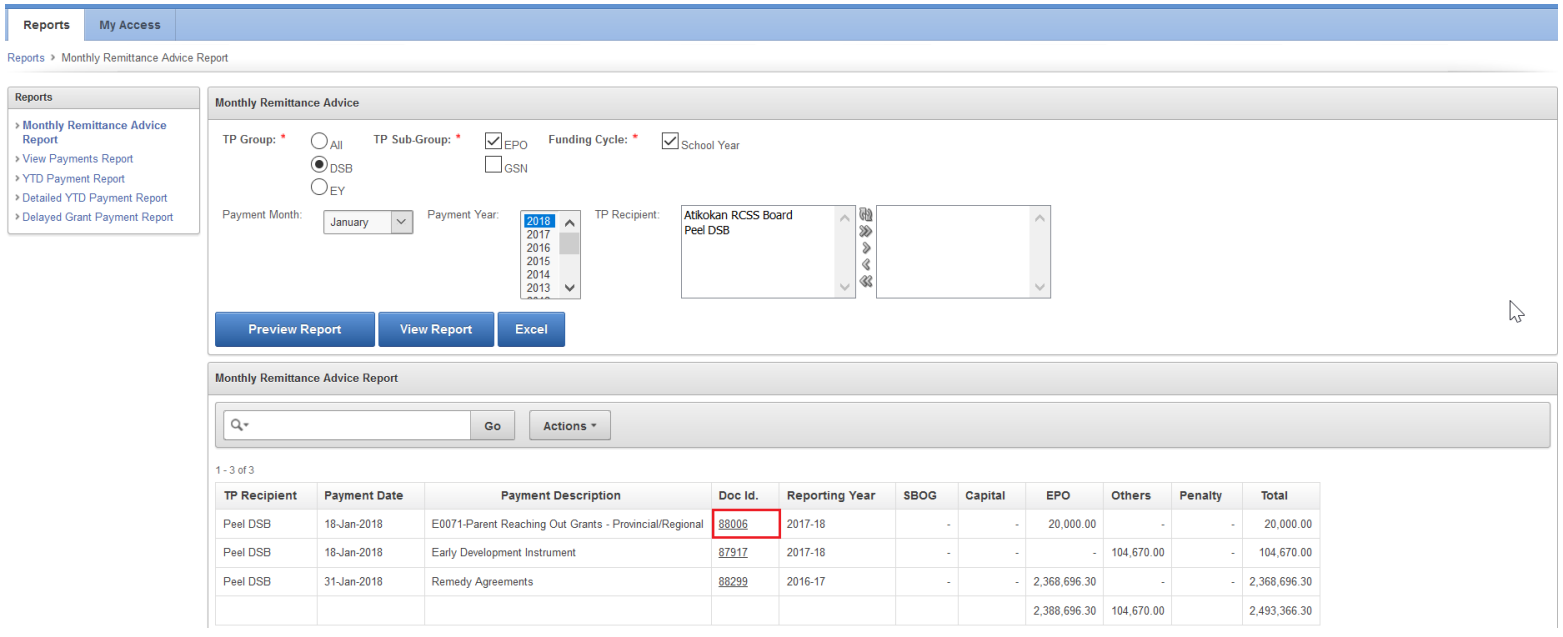
Monthly Remittance Advice Report
- Provides users with a report on payments made for the month specified
-
View Payments Report
- Allows users to see payments that meet specified criteria
- This report also allows users to select Payments related to a specific Document #
- The maximum number of records this report can generate is limited to 20,000
-
YTD Payment Report
-
Provides details related to payments made for a specified time period
-
Detailed YTD Payment Report
- Provides a breakdown of the specified payments made
- This report is useful to Child Care and Family Support Program Users as funding related to each Detail Code is presented
-
Delayed Grant Payment Report
- Only accessible to School Board Users
- Allows the user to see details related to Grant Payment amounts that have been withheld
-
Document Report
- Allows users to view a specific document
The first 5 reports can be accessed by clicking on the Report Name under the Report Tab.
The Document Report is accessible from the Doc. Id column under all 5 reports. Please refer to the Document Report section for additional details.
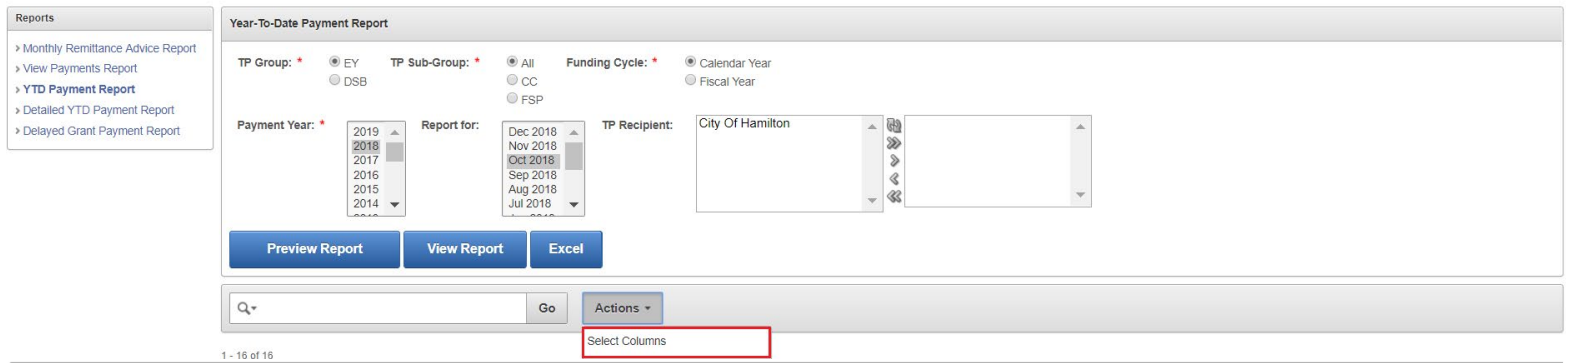
1.3.2 Generating Reports
Each report is generated separately based on the user's selection.
All mandatory fields that require data will have a star * marked beside it.
All non-mandatory fields can be left blank. By default, blank means ALL.
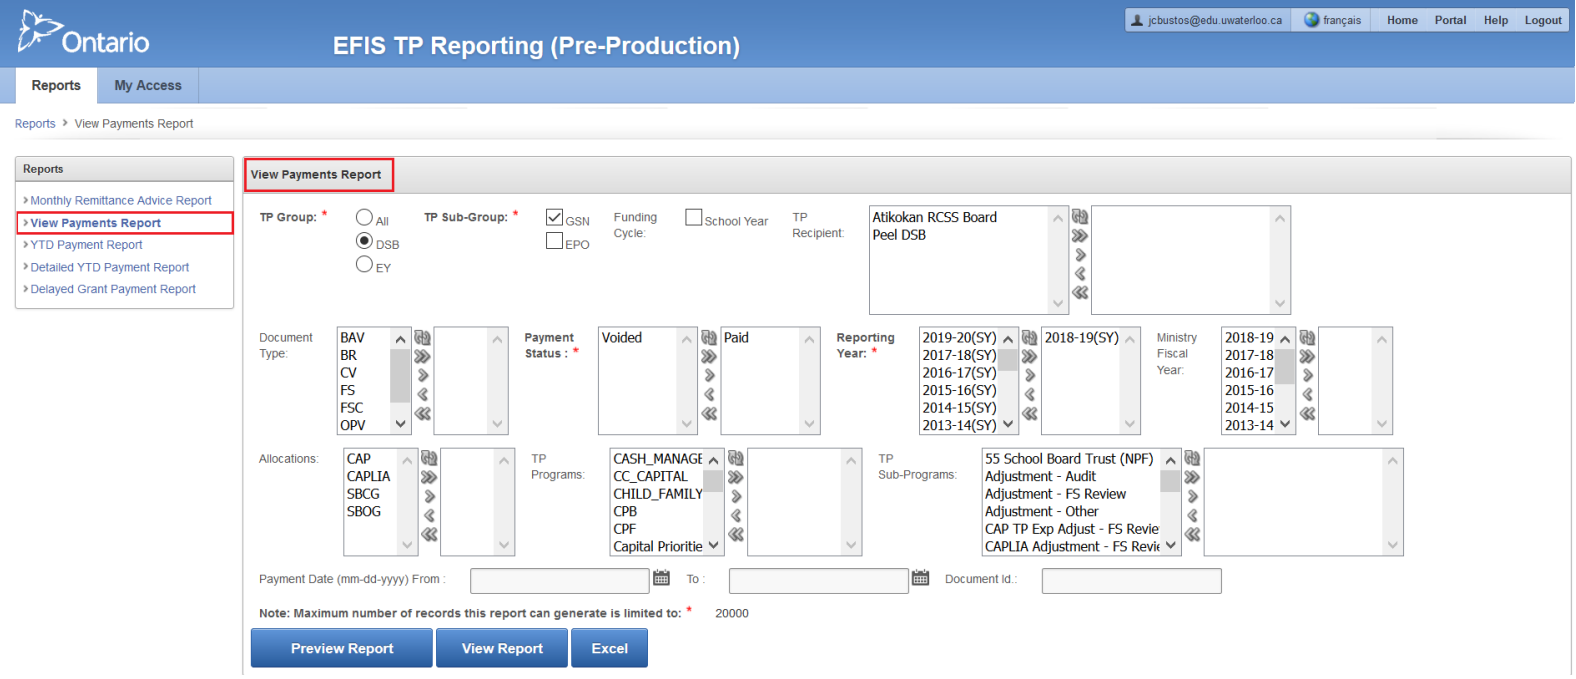
Proceed by indicating the required fields, which is dependent on the chosen report.
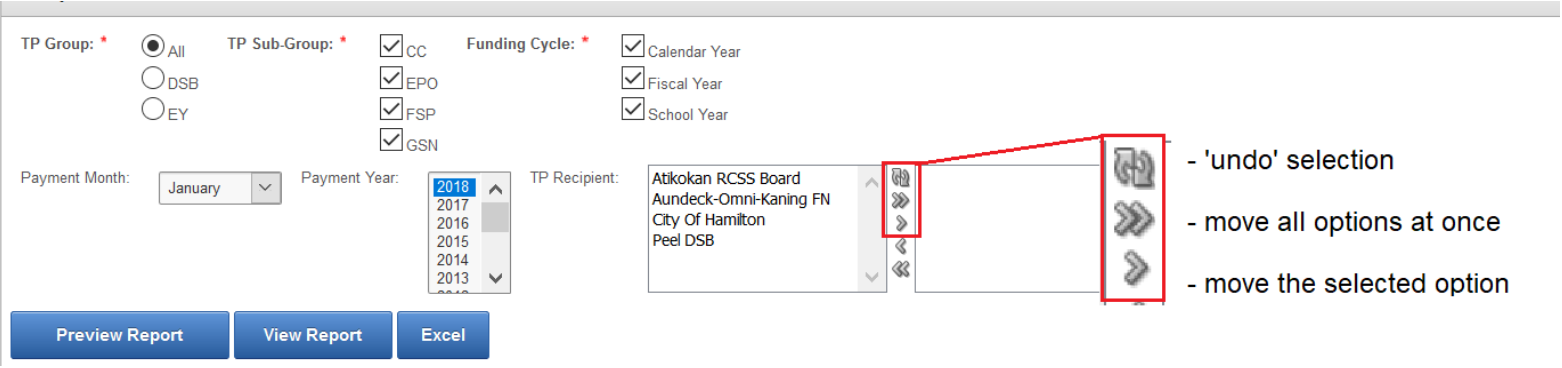
- TP Group: School Board or Early Years
-
TP Subgroups:
- School Board: GSN (Grants for Student Needs) or EPO (Education Payments-Others)
- Early Years: CC (Child Care) or FSP (Family Support Program)
-
Funding Cycle:
- School Board: School Year
- Early Years: Fiscal or Calendar Year - with the ability to select ALL
- Payment Status: Voided or Paid
- Reporting Year - refers to the reporting year of the entity
Document Type, TP Recipient, Ministry Fiscal Year, Allocations, TP Programs, and TP Sub-Programs are examples of non-mandatory fields that if not specified will default to an All selection.
To display specific options, the choice must be moved to the box on the right-hand side. The user can double click or use the available tools to perform the move.
After all the desired fields are filled, there are multiple options on how results can be shown.
-
Preview Report: This option will display the results below the search bar.
-
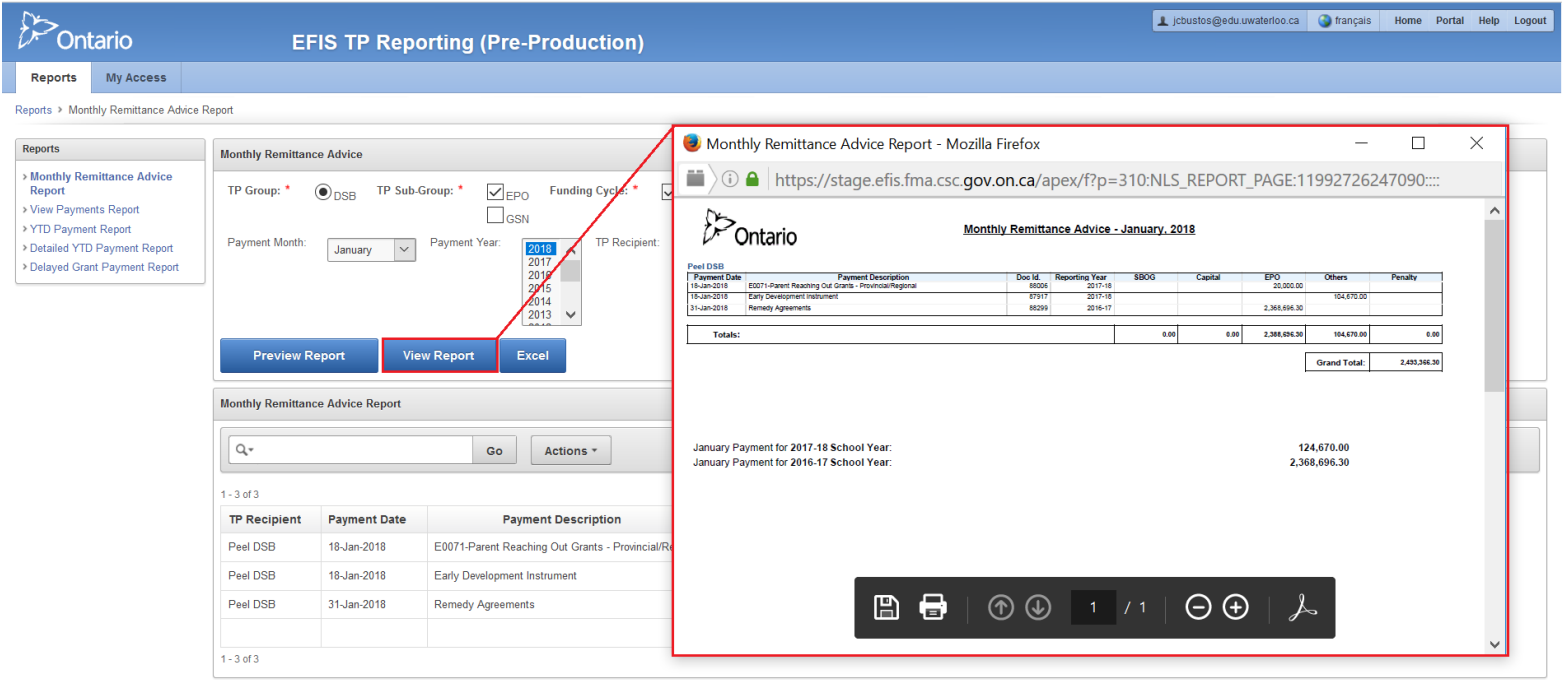
View Report: This option will open a printable version of the created report in a separate window.
-
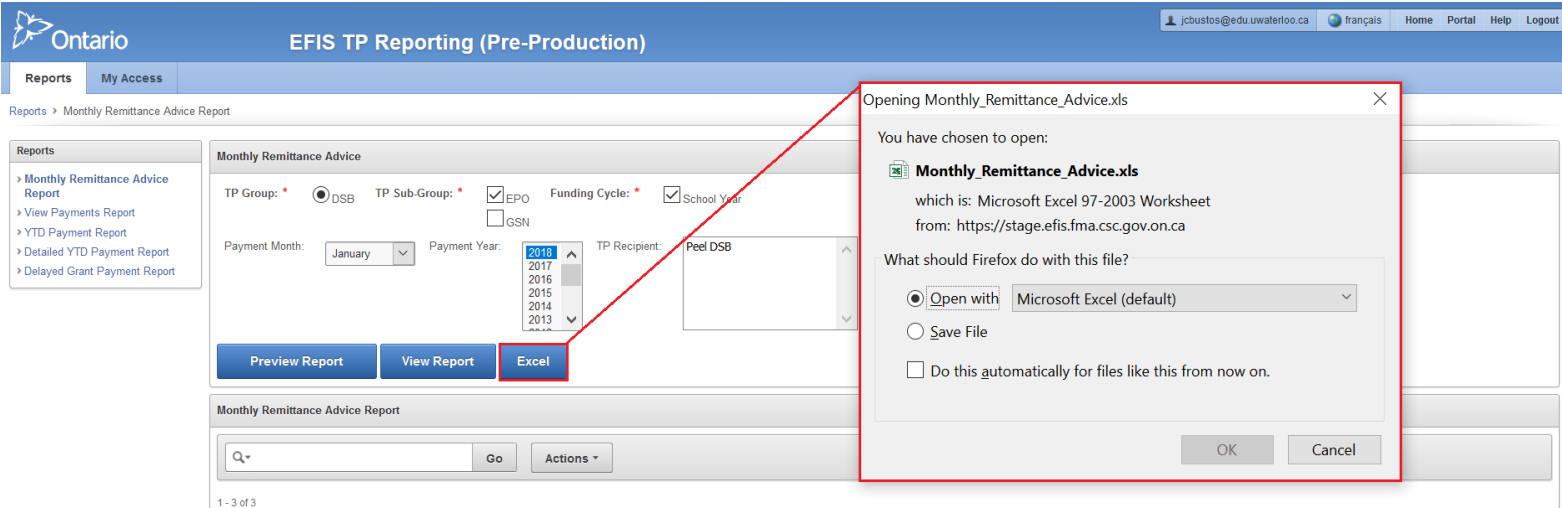
Excel: This option will export the report to an Excel file and will open a confirmation window asking whether to Open/Save the file.
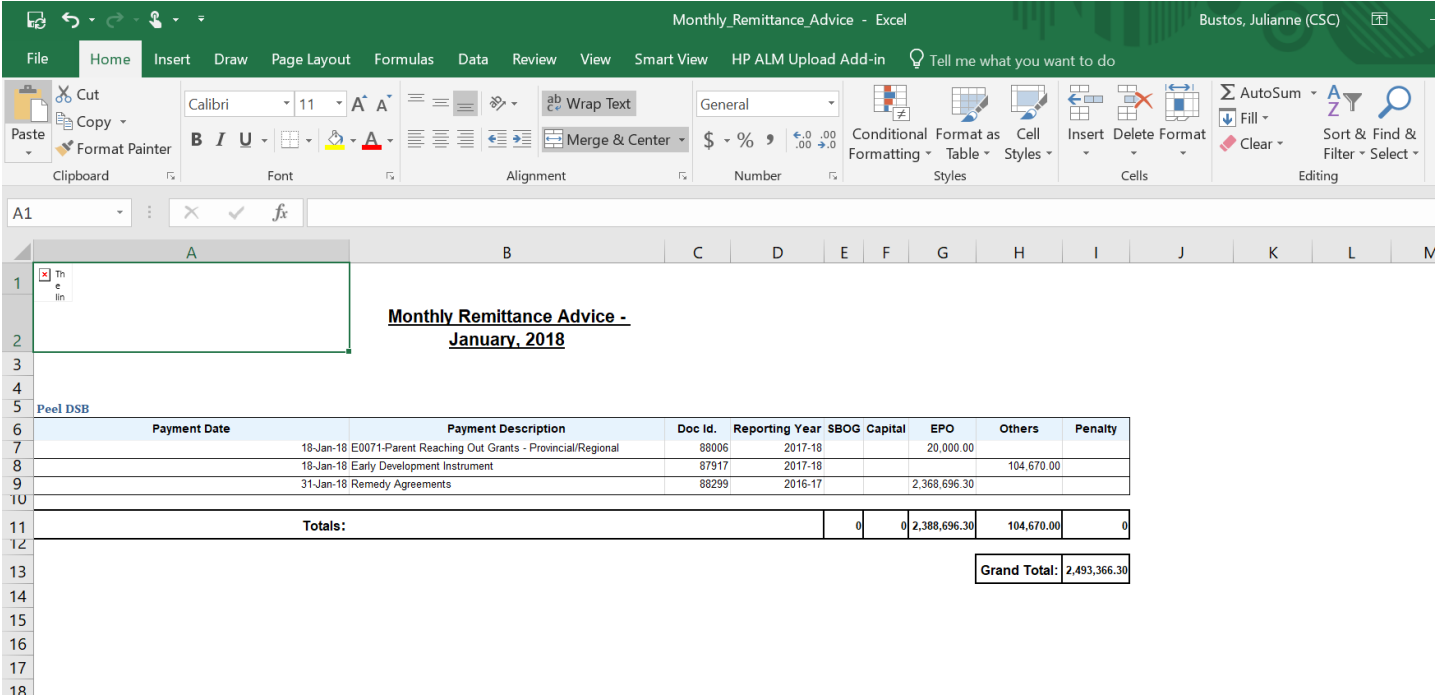
 An example of a report exported to Excel is shown in the print screen below. The reports will not always be perfectly formatted to fit the cells in Excel, but it is adjustable.
-
The Actions > Download feature will allow the user to choose which format the report should be downloaded in. The options available will vary depending on the type of report that was selected.

1.3.3 Customization and Filtering
Note
This Customization and Filtering section only applies to the “Preview Report” option.
i.e. The PDF and Excel version of the report will not reflect the customization.
There are many ways users can modify the “Preview Report” to best suit their needs. Some ways of filtering and customizations after reports are completed are mentioned below.
If the user wants to clear any of the filters/customizations they can select the 'X' beside each performed action. Unchecking the box beside the action is another way to temporarily ignore the filter.

Alternatively, the user can also go to Actions > Reset to return to all default settings.
Using the column headers is a simple way to filter the display of results.
Options available will be as shown from left to right: Sort Ascending Order, Sort Descending Order, Remove Column, Control Break.
Double click to select any of the options in the column list as seen below.

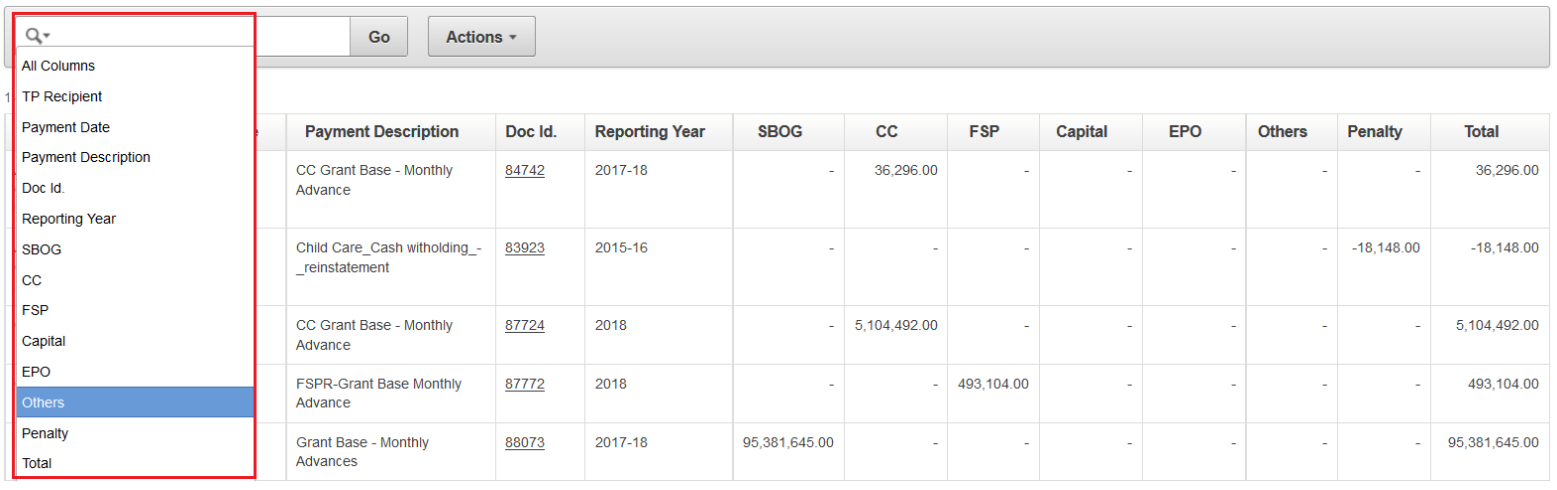
With the Magnifying Dropdown, users are able to specify which of the columns they would like to conduct a search on. If this is not specified, the system will filter through all the columns in the report.
Continue by typing in the Search Bar > GO. The completed search will say '[column] contains [text]'.

Actions > Filter can also be used to filter results from the available columns and rows.
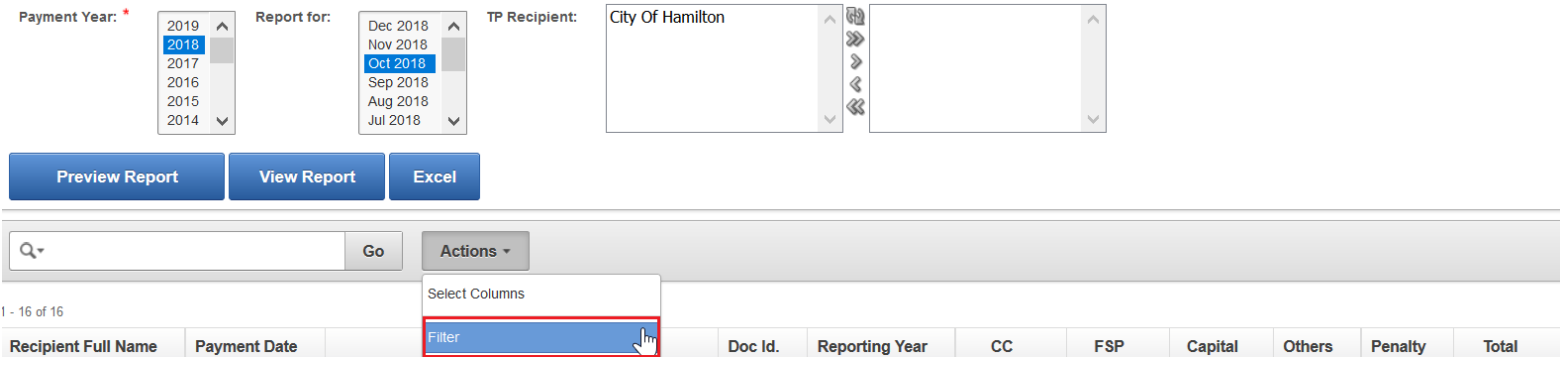
Expressions field is conditional based on which columns/rows and expressions are chosen and can be selected using the dropdown arrow.

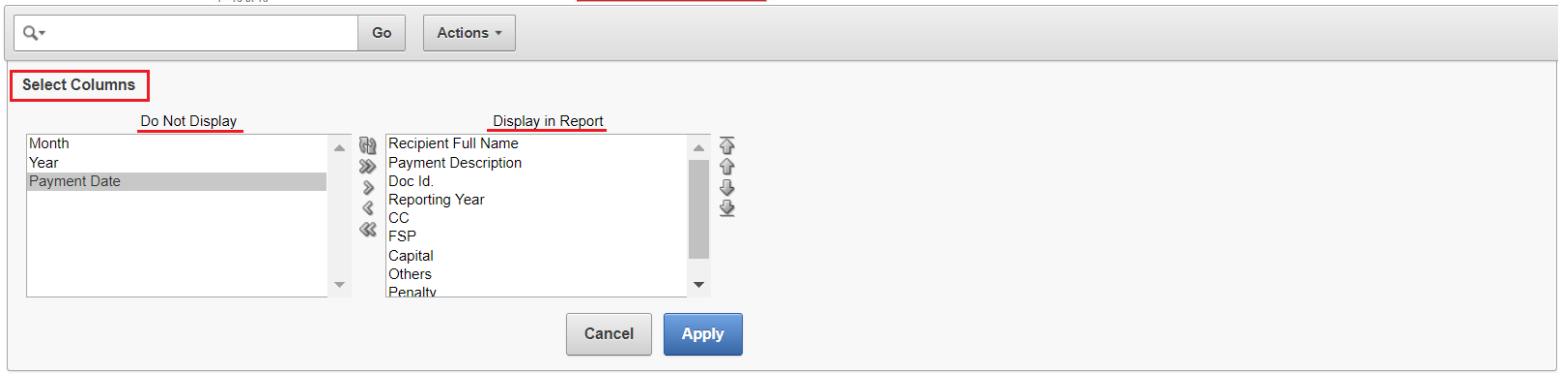
Actions > Select Columns will allow the user to choose which columns will/will not be displayed in reports.
The system also allows the user to save generated results. You can perform the steps either before or after you generate the results.
Actions > Save Report > Name/Description > Apply
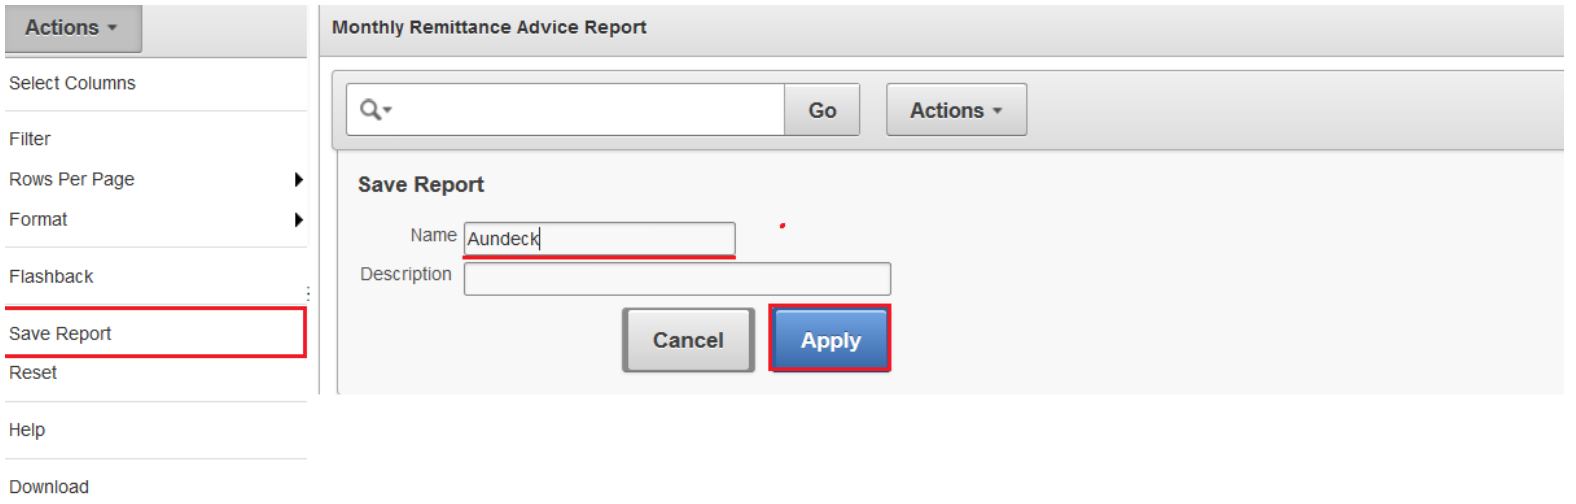
This will now create a 'private' report that you can go back to as you can continue to use the application.

User can go back and forth between Primary Report and the saved report while performing different actions in both.
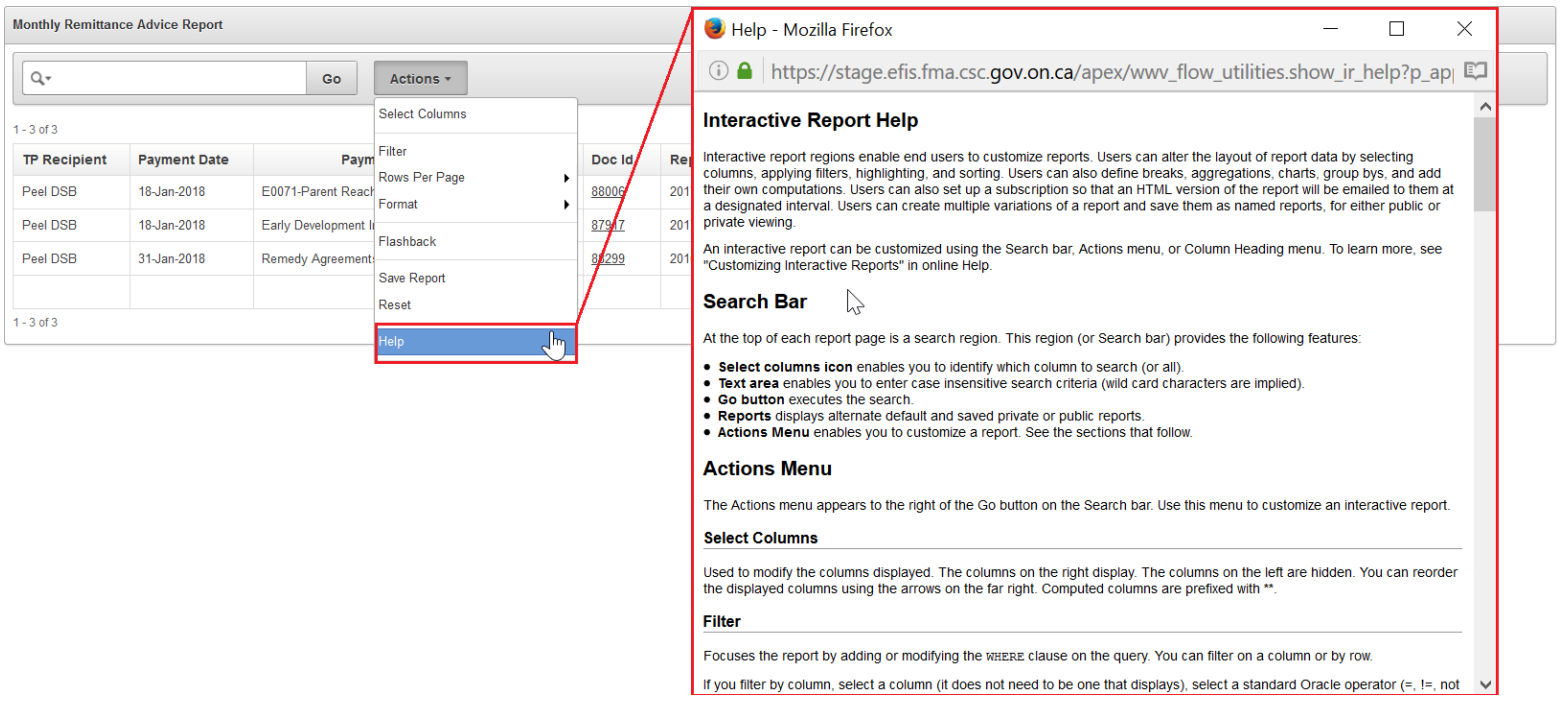
Actions > Help will describe the functions that are within the Search Bar and Actions Menu in a pop-up window.
1.3.4 Document Report
All 5 Reports have a Doc. Id column that allows the user to “Preview Report”.
If the user wants to search for one specific Document they can select the “View Payment Report”. This report has the “Document Id” entry field. Once a Document ID is entered, all other criteria will be ignored even though the mandatory fields need to be selected.
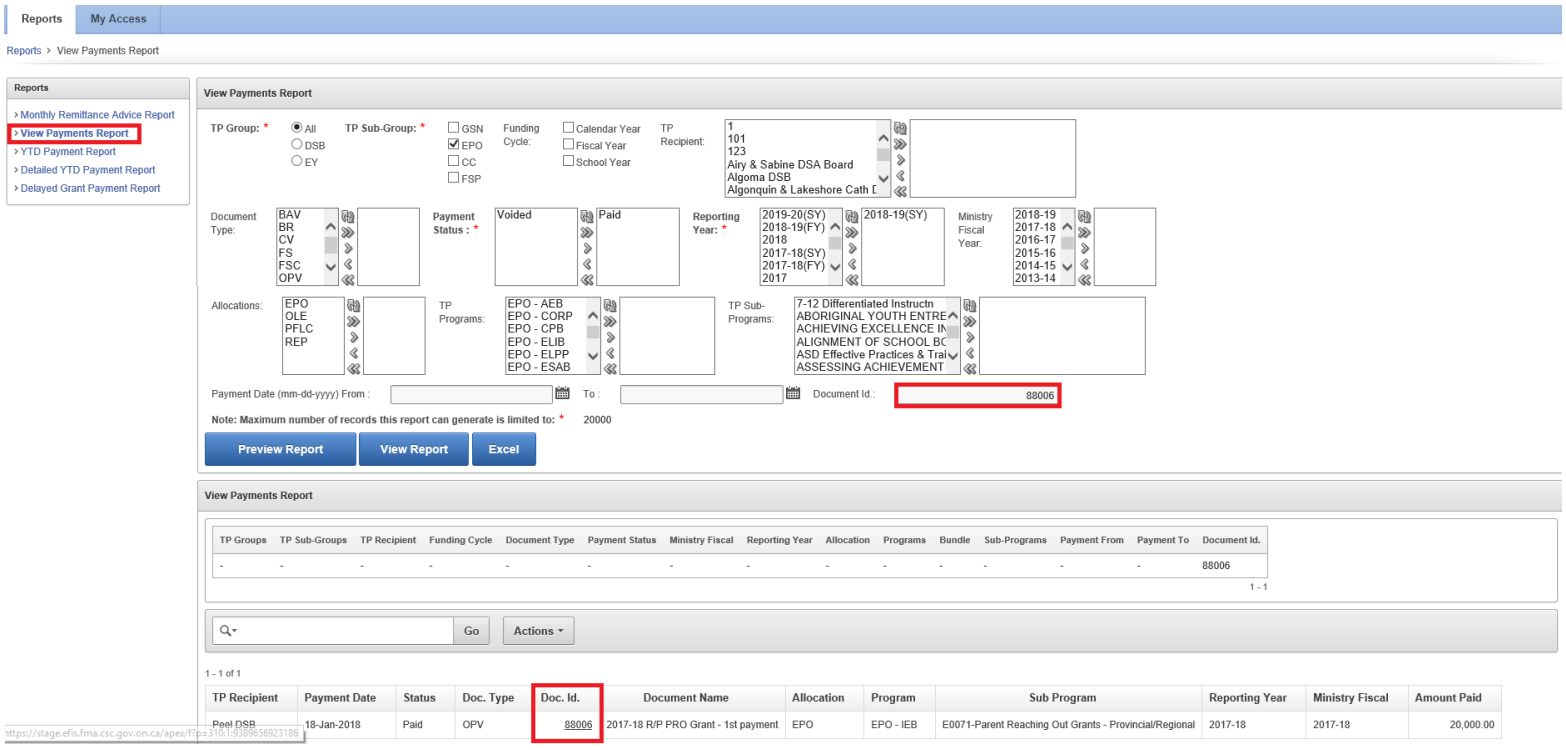
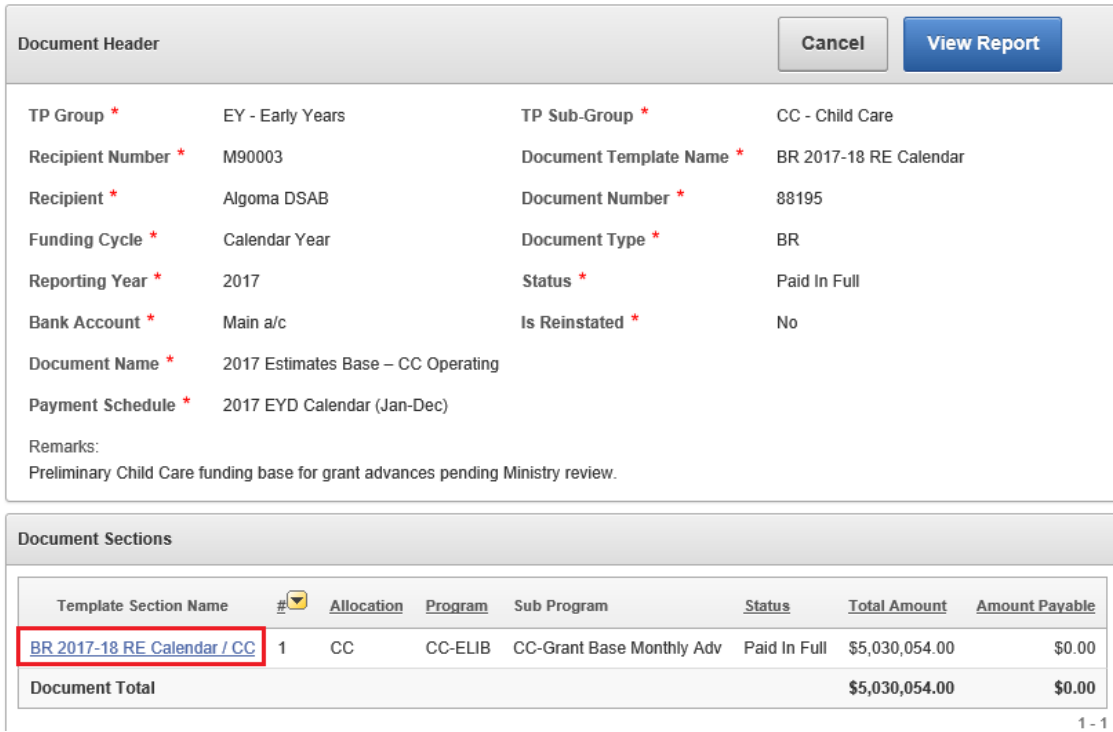
The Doc. Id column provides a hyperlink for users to be able to open the document with more details. Simply select the Id, or right click to open the Document Detail page.
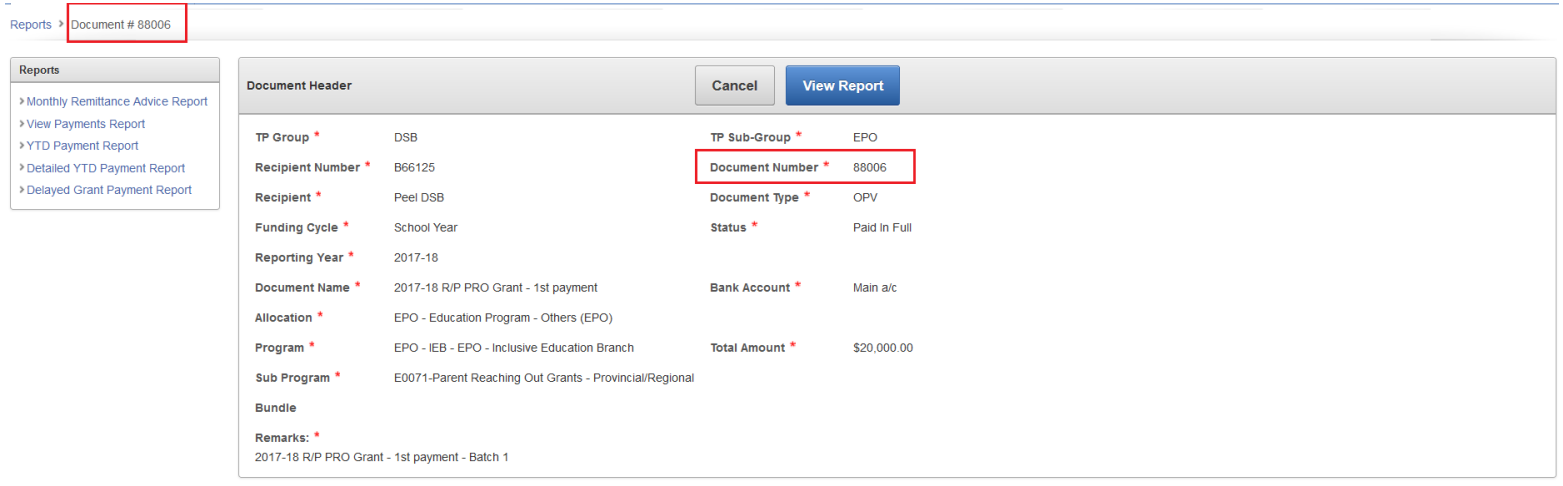
In this Page, you can see the details related to the Document.
Also, the user can press on the “View Report” button to generate the PDF version of the Document Report.
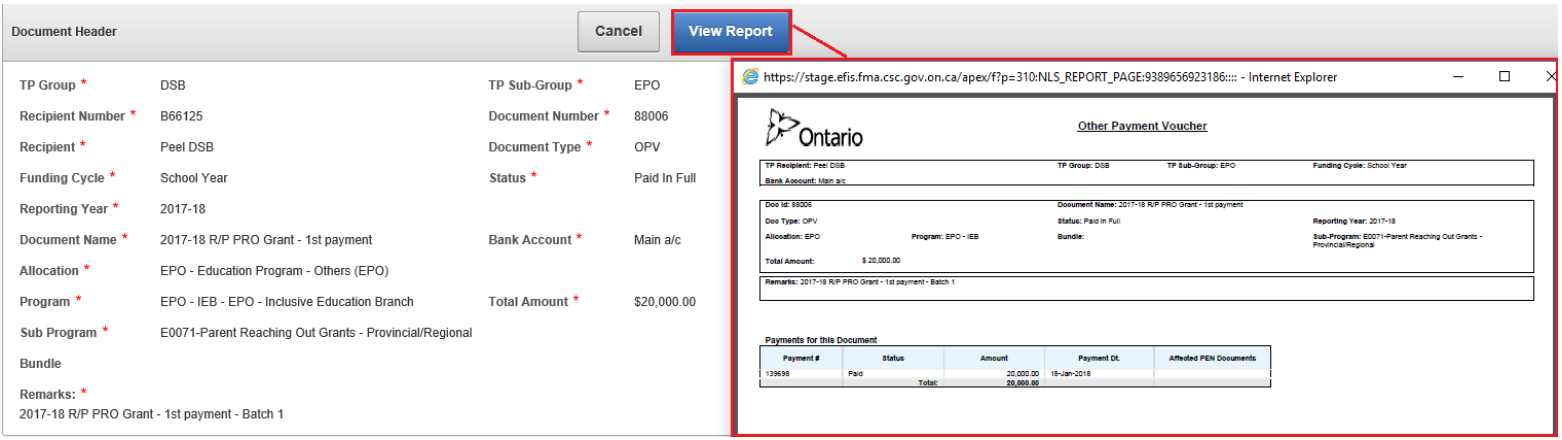
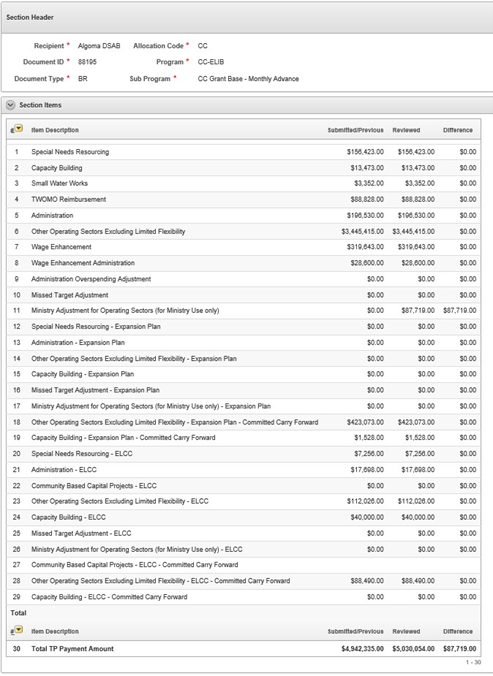
For BR / FS / FSC Documents, the user can click on the links under the Document Sections to see the detail related to the section.
Section Detail Page:
Changelog
| Version | Date | Changed by | Description |
|---|---|---|---|
| .01 | October 22, 2018 | Julianne Bustos | Initial Draft |
| .02 | October 22, 2018 | Karen Yeung | |
| .03 | March 21, 2025 | Angelie S. | Modified "Contact Us" footnote |